We have a joke here in the NW, "What do you call two rainy days in a row? - A weekend". We've been having beautiful 80 deg weather right up to Labor Day weekend and what do you know, two days of rain so far with 80 deg weather forecast for Tuesday. I had planned to go out and shoot this morning in the garden, but it was too windy and rainy to do that. So I went out to the garden and cut a couple of the flowers, the ones I had planned to shoot outside, and took them in doors. The blog images are from that shoot - what follows is a brief outline of how I created the images.
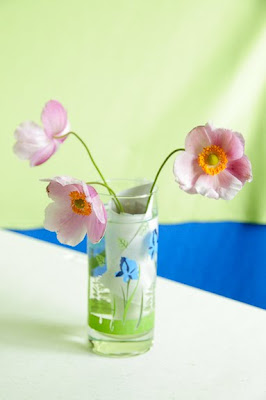
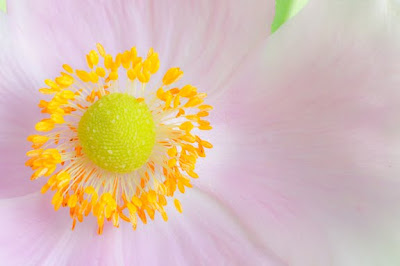
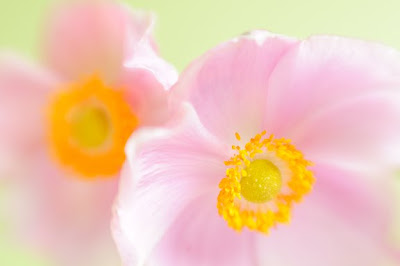
First, after cutting the flowers and putting them in a small vase with water, I set up a small table next to the window as shown - it was cloudy so the light was nice and diffused. I have a set of fabrics on a rod that I use for backgrounds on such occasions (al a Tony Sweet's studio). In this case I chose a light spring green. Second, I popped a Lensbaby 3G on my D300 and proceeded to create. I used a f4 aperture ring on the Lensbaby and in general used the push method where you extend the Lensbaby bellows instead of compressing it. I moved the flowers as needed to create compositions that seemed pleasing to me. I also needed to use a small reflector to fill in some of the shadows (a white sheet of paper does the trick). Later I put on a 50mm lens with an extension tube to do more closeup work. Note, I also used a tripod and cable release as feasible. Once I had the images I wanted, I went through a set of post-processing steps as needed.
- Load image into Lightroom and sort through the images in the Library mode to find ones you want to develop (discard the rest). Go to the Develop mode.
- Adjust the Exposure slider to the right until the histogram is to the right without blowing out the whites. I do this for creating a light airing feeling - called "high key" lighting.
- Use the Fill Light slider to get rid of "black holes" - they tend to draw your eye. Try to avoid these with the reflector during the shoot.
- If there are some really dark areas, you may need to use the Adjustment Brush to select an area and increase the local exposure and/or brightness.
- Use the clone tool to remove imperfections from the flowers - brown spots just don't look good (the flowers you cut should be as pristine as possible).
- In a soft focus image like this, I might use the Adjustment Brush to select the focal point (one focused area where the eye can rest) to add some Clarity and/or Sharpness.
The final image is one shot with the 50mm lens with a little diffusion added in post processing.