Sunday, August 29, 2010

Old Barns

Coupeville Barn

If any of you have been following my Flickr Photostream you may have noticed a lot of old barns lately – converted to black and white. The detail you can bring out in a B&W HDR  barn image is just wonderful. Old barns strike a cord with me, either because I am getting old or because I had the privilege as a teenager of working on a farm – mostly tossing hay bales around. Must be the later. Anyway, here are a few of my favorites from the series so far.

Blog_20100729_3

Blog_20100729_2

Old Dutch Barn 1

Note: I am still working on the first video – taking a bit longer then I thought to work out all the technical kinks. The first video will cover the B&W conversion of a barn image so stay tuned.

Saturday, August 21, 2010

More Sunflowers

 Blog_20100820_1

As I promised in my previous blog here are some additional ideas of what do with sunflowers.

Blog Images:

The lead blog image is just a simple close-up but getting it wasn’t simple. I was shooting outdoors in the early morning light. There was just the slightest breeze, but not enough to let me shoot the length of exposure I needed for f36 (need the DoF when you are this close). A really high ISO might have gotten me there, but instead I shot at f10 at 1/30sec and ISO 640 and shot five images each with the focal point moving from the front of the flower to the back pedals. As in a previous blog I used the focus stacking capability of Photoshop CS5.
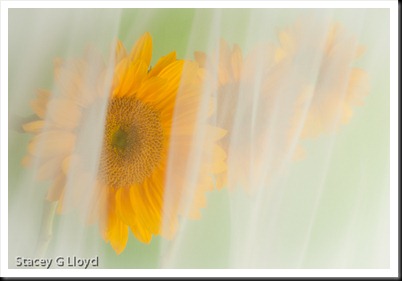
Blog_20100730_1-2A bridal veil drawn vertically across a group of sunflowers was used to create the unique look shown here. The shutter was a bit long to allow the veil to blur a bit. Window light and reflectors were again used for illumination.

The next image was shot in the same field as those in my previous blog using the wheat as a background. For the unique look shown here I applied the Monday Morning – Sepia filter from  Nik Software’s ColorEfx Pro. Viveza 2 was used to lighten the lower center of the sunflower. Finally  the edges and wheat were burned in using Photoshop’s burn tool.

Blog_20100809_1-5

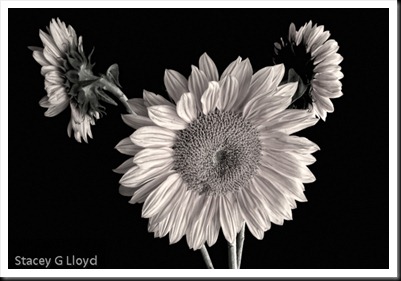
In the final image, three sunflowers were arranged in a vase in my studio and shot using window light and reflectors against a black background. A wide angle lens was used to create the perspective (I don’t use wide angle lenses indoors all that often). Again I used the Monday Morning filter but with different slider adjustments. After that the Tonal Contrast filter was used to bring out a bit more texture. The face of the front sunflower was lightened a bit using Viveza 2.
Blog_20100730_1

NOTE: I plan on adding How-To videos to my blog in the near future. If there is any image you would like me to walk through the post processing  let me know.

Friday, August 13, 2010

Sunflowers

Blog_20100809_1-2

It is definitely the time of year for sunflowers. They are showing up on everyone’s blog. So in keeping with the trend, here are a few of my recent sunflower images. This set is all from one sunflower field. If you can’t think of new ways to shoot sunflowers, these might stimulate some ideas. Here in Oregon the sunflower fields are pretty spread out. I found the nearest one using Google, a place called Grandma’s Garden.

Blog_20100809_1-4

Blog_20100809_1-3

Blog_20100809_1

Blog images:

  1. The opening image is a field of sunflowers overexposed. I must admit I came into this image sideways. I was actually shooting an HDR image and decided I liked the look of the +1 stop exposure. I hope to get back and shoot a panoramic vs. this crop.
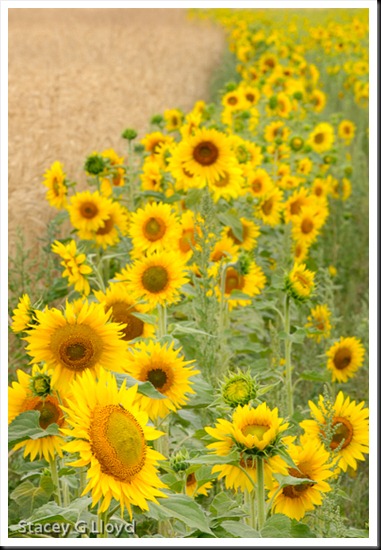
  2. A wheat field was next to the sunflower field and made for a great background (color and texture). I used the tonal contrast filter in Color Efx Pro to bring out more texture.
  3. For this image i did a 9 image multiple exposure while rotating the lens in its collar and keeping the rotation point over one sunflower off of center.
  4. The final image utilizes the wheat field edge, which had a little curve, to add more compositional interest as the sunflowers tapered off into the distance. I used the side facing sunflower to push the viewer’s look back and to the right  - making the C-curve stronger.

I am sure I will be posting some more  sunflower images in a future blog.

Sunday, August 8, 2010

Learning About IR Photography - Revised

Tree and cloudAs I continue to shoot different subjects in infrared, I am starting to learn a couple things I didn’t know. Note that I am shooting IR using a Nikon D70 which has been converted/modified for infrared image capture.

REVISED – I realized as I was shooting more IR today that what I wrote down yesterday was backwards. My apologies. Here is a more correct explanation

  1. CORRECTED - Metering behavior is different. At first it seemed a bit erratic. While the meter still looks at the visible light, the amount of IR energy in the scene can vary with the subject and time of day. If the scene is mostly green foliage the meter will read that typically as 18% gray tone. However, green foliage emits a lot of IR and is thus very bright (more as the day goes on)  – it is almost white. Your meter is effectively overexposing for a scene that is mostly white not gray as it measured. This means you need to adjust the EV –1 to –2 to keep the image from blowing out.  On the opposite end, images with a lot of water or other “cool” elements (that record nearly black) may require adjusting your EV  +1 to +2. For a nice mix of say sky and foliage the meter gets it about right. In time you start to see the infrared image in your head and compensate your exposure accordingly. Checking the LCD and histogram is a good idea too.
  2. Not all lenses behave the same. Besides the usual lens flare issue you can encounter in normal photography, there are hot spots (milky areas near the center of the image – shown in the adjacent image). Some lenses are very prone to this while others are not. Apparently the behavior depends on the coatings for a specific lens. It is aggravated by small apertures. Using wider apertures may help but may not eliminate the problem (but you lose depth Blog_20100801_1of field). Bottom line, standard camera lenses are not necessarily designed or tested for the infrared light spectrum. One last note, apparently this hot spot can often be eliminated in post processing by not using the color channel in which the spot is dominate.  I didn’t find that worked on the image shown to the right.
  3. Even if your modified camera was adjusted so that the IR light focuses correctly on your sensor for one lens it may not for others. Same bottom line as above – standard cameras and lenses are not designed for IR. If you avoid shooting with the aperture too wide open this will not be a problem.

Now don’t let these things scare you off from going into digital IR. They aren’t that big of an issue once you know about them. They might limit you in some ways, but infrared photography opens up a whole new photographic frontier for you to explore.

Finally, I have been experimenting with different post processing to see what I like.  The final blog image is one example of using toning with a heavy vignette on an infrared image.

Blog_20100803_1-2

Sunday, August 1, 2010

More on Simple – How to

Half Lilly

Here is another example of keeping things simple. This image is all about the light and composition. Even the depth of field is simple – everything is in focus, front to back. But there is the rub. Keeping all of this in focus was not simple. This close up was shot with a 105mm macro lens at f32 but that did not keep everything in sharp focus. To get things sharp from front to back I had to take three exposures with the focal point different for each one: front edge, stamen and back interior. Fortunately there are great tools like Photoshop CS5 that allow you to align and blend three images with just a couple mouse clicks.

Here is how you do that:

  1. Import your set of exposures as separate layers in Photoshop.
  2. Select all of the layers.
  3. On the Edit pull down menu select Auto-Align Layers.
  4. In the Auto-Align popup box select “Perspective” and click OK.
  5. When that is done go back up to the Edit menu and select Auto-Blend Layers… and select “Stack Images” in the popup box. Click OK.
  6. At this point you should have a nicely blended image with only the sharp focus section of each exposure used.
  7. If there are some artifacts or errors on Photoshop’s part, you can go in and touch up the Mask layers, created by Photoshop, with a brush as needed.
  8. Flatten out the layers and you are done.
  9. Now wasn’t that simple?